Tutorials

How to create additional RDP user on Windows Server

How to Create Additional RDP User on Windows Server

Running everything on a Windows Server with a single Administrator account is convenient — until you need to give a colleague access, a developer needs to deploy code, or you want to limit what an application account can do. Creating additional user accounts is the right way to share a server safely. This guide shows you how to create additional RDP user accounts on Windows Server, grant them Remote Desktop access, and manage their permissions the secure way. Why Create Additional Users? Separate user accounts give you three big advantages over sharing one Administrator login: Prerequisites Method 1: How to Create Additional RDP User with Computer Management (GUI) This is the most visual method and works on all modern Windows Server versions. The account now exists, but it cannot do much yet — including logging in over RDP. That requires the next step. Granting RDP Access: The Remote Desktop Users Group By default, only Administrators can connect to a Windows Server over Remote Desktop. To let a standard user connect via RDP, add them to the Remote Desktop Users group. Microsoft’s documentation on allowing Remote Desktop connections explains this group-based approach in more detail: The user can now log in to the server through Remote Desktop with their own credentials. They will have standard user permissions — enough to work, but not enough to change system settings or install software server-wide. If the user genuinely needs full control (for example, a co-administrator), add them to the Administrators group instead, using the same steps. Be conservative with this: every administrator account is a high-value target for attackers. If you are unsure whether RDP is safe to expose, review the risks before granting that level of access. Method 2: Create a User with PowerShell For repeatable setups or managing several accounts at once, PowerShell is faster. Open PowerShell as an administrator and run: You should see jdoe in the list. To grant administrator rights instead, replace “Remote Desktop Users” with “Administrators” in step 3 — but think twice before doing so. Managing Existing User Accounts Creating accounts is only the beginning. Here is how to handle the everyday tasks, including how to change a Windows RDP password when a user forgets theirs: Security Best Practices for Server User Accounts Conclusion Creating additional users on Windows Server takes less than five minutes per account, and it is one of the highest-value security habits you can adopt. Remember the two-step pattern: create the user first, then add them to the Remote Desktop Users group to enable RDP access. Keep administrator rights rare, document what each account is for, and review the user list regularly. Your future self — and your security logs — will thank you. Frequently Asked Questions I created a user but they get “The connection was denied” when using RDP. Why? The most common cause is that the user is not a member of the Remote Desktop Users group (or Administrators). Add them to the group as described above and try again. Also check that RRemote Desktop is enabled on the server and that no firewall rule is blocking port 3389. Can two users be logged into the server at the same time? On Windows Server editions, yes — the server operating system supports two simultaneous remote administrative sessions plus the console session by default. If you need more concurrent users, you need the Remote Desktop Services role with the appropriate client access licenses. Should service accounts be in the Remote Desktop Users group? Generally no. Service accounts exist for applications, not for interactive logins. Keep them out of remote-access groups, give them only the specific permissions the application needs, and set long, random, non-expiring passwords stored in a password manager. What is the difference between disabling and deleting a user account? Disabling blocks logins immediately but keeps the account, its group memberships, and its SID intact — perfect for temporary suspensions. Deleting removes the account permanently; if you recreate a user with the same name later, it gets a new SID and none of the old permissions carry over.

How to Create Additional RDP User on Windows Server Read More »
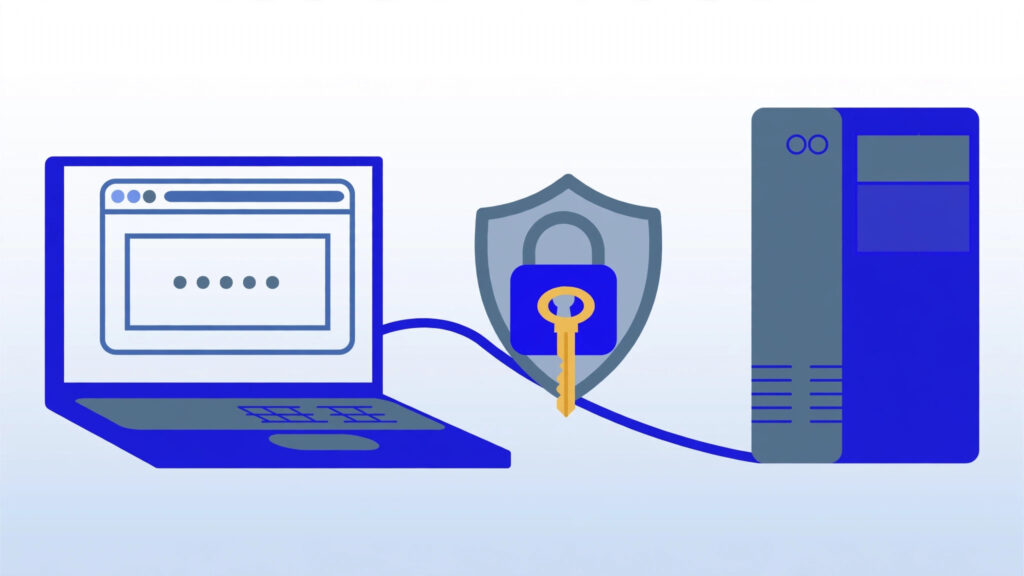
how to change Windows RDP password - laptop connected to a Windows server with padlock shield and key

How to Change Windows RDP Password Safely

Learning how to change Windows RDP password safely is one of the simplest security habits you can build — yet doing it carelessly over a remote connection can lock you out of your own server. This guide walks you through three reliable methods to change your Windows Server password, plus the safety steps professionals take before touching credentials on a production machine. If you have ever asked yourself is RDP safe, keeping your password strong and up to date is one of the most important answers. Before You Change Anything: The Safety Checklist Read this section first. It takes two minutes and can save you from a very stressful afternoon. Method 1: How to Change Windows RDP Password Over RDP (Recommended) This is the standard method when you connect to a Windows VPS using Remote Desktop and are already logged in. Your RDP session stays connected — you do not get disconnected when you change your own password this way. The next time you log in, use the new password. Method 2: Change Another User’s Password via Computer Management Use this method when you are an administrator and need to change the password of a different user account. If that account does not exist yet, follow our guide on creating additional RDP users on Windows Server first. This method resets the password immediately without asking for the old one, which is why it requires administrator rights. Be careful: it can invalidate the user’s encrypted files (EFS) and saved passwords, so prefer Method 1 when users change their own passwords. Method 3: Change the Password with PowerShell If you prefer the command line, or need to change a password as part of a script, PowerShell is the cleanest option. Replace “Administrator” with your actual username. You will be prompted to type the new password securely. The * tells Windows to prompt you for the new password instead of typing it visibly in the command line. Never type a password in plain text on a command line — it gets saved in history. What to Do Right After Changing the Password Changing the password is only half the job. Finish properly: What If You Get Locked Out? Do not panic — most RDP connection problems after a password change have a simple fix. Try these in order: Password Best Practices for Servers For the official steps, see Microsoft’s guide to changing your Windows password. Conclusion Changing your Windows Server password safely comes down to three things: having a backup way into the server, knowing where the old password is used, and testing the new one before you walk away. The Ctrl + Alt + End method covers everyday changes over RDP, Computer Management handles other users’ accounts, and PowerShell gives you a scriptable option. Build this into a routine — regular password changes, combined with strong unique passwords, are one of the cheapest security upgrades a server can get. Frequently Asked Questions Will changing my password disconnect my RDP session? No. Changing your own password while logged in does not terminate your current session. You keep working normally, and the new password simply applies to your next login. I changed the Administrator password and now a service won’t start. What happened? The service was configured to log on with the Administrator account and the old stored password. Open services.msc, find the service, open its properties, go to the Log On tab, and update the password to the new one. Then start the service again. How often should I change my Windows Server password? For most small setups, changing server passwords every 60 to 90 days is a reasonable routine, plus immediately after any team member leaves or if you suspect the password was exposed. More important than frequency is using a strong, unique password in the first place. Can I change the password if I forgot the old one? Not through the normal change-password screen — that requires the old password. An administrator can reset it for you via Computer Management (Method 2), or you can use your hosting provider’s console or support team to regain access.

How to Change Windows RDP Password Safely Read More »

How to connect Windows VPS remote desktop — laptop connecting to a cloud server

How to Connect to a Windows VPS Using Remote Desktop (Step-by-Step)

Connecting to a Windows VPS is nothing like connecting to a Linux server — there is no terminal wizardry required. You use Remote Desktop Protocol (RDP), which gives you the full Windows graphical desktop in a window on your own computer, exactly as if you were sitting in front of the server. This tutorial walks you through how to connect Windows VPS remote desktop, step by step, on Windows, Mac, Android, and iPhone — plus how to fix the most common connection errors. What You Need Before You Start Your hosting provider should have emailed you (or shown in the control panel) the following details after your Windows VPS was provisioned: You will also need a reasonably stable internet connection. RDP is efficient, but a very slow or unstable connection will make the remote desktop feel laggy. Note: On most hosted Windows VPS plans, Remote Desktop is already enabled by the provider. If you installed Windows yourself, you may need to enable it first under Settings > System > Remote Desktop. See our guide on how to enable Remote Desktop on Windows 10 and 11. How to Connect Windows VPS Remote Desktop From Windows Windows includes a built-in Remote Desktop client, so you do not need to install anything. Step 1: Open Remote Desktop Connection Press Windows key + R on your keyboard, type mstsc, and press Enter. The Remote Desktop Connection window will open. (You can also find it by searching “Remote Desktop Connection” in the Start menu.) Step 2: Enter the server’s IP address In the Computer field, type your VPS IP address (for example, 203.0.113.10). If your provider uses a custom RDP port, add it after a colon, like 203.0.113.10:3390. Click Show Options if you want to adjust settings such as screen size or save your credentials — optional, but handy. Step 3: Click Connect and enter your credentials Click Connect. Windows will prompt you for credentials: Check Remember me if you are on your own private computer and want to skip this step next time. Never check it on a shared or public computer. Step 4: Accept the certificate warning The first time you connect, you will see a warning saying the identity of the remote computer cannot be verified. This is normal — most VPS servers use a self-signed certificate. Check “Don’t ask me again for connections to this computer” and click Yes to continue. Step 5: You are in After a few seconds, the full Windows desktop of your VPS will appear. You can now install software, change settings, and manage the server exactly as if it were a local PC. When you are done, simply close the Remote Desktop window (this disconnects you but leaves the server running) or use Start > Power to restart or shut down. Traders commonly use this RDP access to manage a forex trading VPS. How to Connect From a Mac Microsoft offers a free official client for macOS: How to Connect From Android or iPhone Tip: on a phone screen, switch to landscape orientation and use the app’s touch mode — it makes navigating a Windows desktop far less painful. First Things to Do After Connecting Once you are logged in for the first time, take a few minutes on these basics: Troubleshooting Common Connection Problems “Remote Desktop can’t connect to the remote computer” This is the most common error, and it usually means one of three things: “The logon attempt failed” (wrong credentials) Usernames on Windows are case-insensitive, but passwords are case-sensitive. Retype the password carefully, watching for caps lock. If you lost the password, most providers let you reset it from the control panel — this usually requires a reboot. Certificate warning on every connection If you did not check “Don’t ask me again,” you will see the warning each time. It is harmless on a server you control. If it bothers you, you can install a proper SSL certificate on the server, but for most VPS use cases the self-signed certificate is fine. Black screen or frequent disconnects This is almost always a network issue on your side or the provider’s. Try lowering the connection quality: in the Remote Desktop client, go to Show Options > Experience and choose a slower connection speed, or reduce the display resolution. If the problem persists, contact your provider’s support. “An authentication error has occurred” (CredSSP / NLA) This can happen when the client and server have mismatched security updates, particularly with Network Level Authentication. First, make sure your local computer’s Windows is fully updated. If the error persists after updating both sides, your provider’s support can help — do not disable NLA as a “fix,” since it weakens security. A Quick Security Note RDP exposed directly to the internet attracts automated login attempts. Protect yourself: For a deeper dive, see our guide on securing your VPS. Conclusion Connecting to a Windows VPS with Remote Desktop takes less than a minute once you have your login details: open mstsc, enter the IP, sign in, accept the certificate, and you are looking at your server’s desktop. The same credentials work from Mac and mobile apps, so you can manage your server from anywhere. If a connection fails, work through the troubleshooting steps above before assuming something is seriously wrong — nine times out of ten, it is a typo, a provisioning delay, or a firewall rule. Frequently Asked Questions What is the default username and password for a Windows VPS? There is no universal default. Providers typically set the username to Administrator and either let you choose the password during ordering or generate one shown in the control panel. Check your provider’s welcome email or dashboard. Is Remote Desktop free? The RDP client is built into Windows and Microsoft’s Mac/mobile apps are free. On the server side, Windows Server licensing is handled by your hosting provider and included in the VPS price. Note that Windows VPS plans usually cost more than Linux ones because of licensing. Can multiple

How to Connect to a Windows VPS Using Remote Desktop (Step-by-Step) Read More »

New VPS setup checklist: configuring and securing a fresh Ubuntu VPS server

Initial Server Setup Checklist for a New VPS

Getting a new VPS is exciting — a blank server, full root access, endless possibilities. It is also the moment when most beginners make the mistakes that haunt them later: skipping updates, working as root forever, forgetting backups until the day they need one. If you haven’t ordered your server yet, start by choosing the right server location for your VPS — it is one of the few setup decisions that is hard to undo later. This new VPS setup checklist walks you through everything worth doing on a brand-new VPS, in the right order. Work through it once, and your server will be updated, secured, and ready for whatever you want to build. The examples use Ubuntu (the most beginner-friendly server OS), with notes where other distributions differ. Before You Start Gather these from your provider’s welcome email or control panel: You will connect from your own computer using a terminal (macOS/Linux) or an SSH client like PuTTY or Windows Terminal on Windows. The New VPS Setup Checklist 1. Log In for the First Time Connect as root. From macOS, Linux, or Windows Terminal: Accept the host key fingerprint when prompted (verify it against the fingerprint shown in your provider’s panel if one is listed). If you set up SSH key authentication during ordering, you will log straight in; otherwise, enter the root password. 2. Update the System Fresh VPS images are almost never fully patched. Update everything before doing anything else: If the kernel was updated, reboot to apply it: Then reconnect. (On RHEL-based systems like AlmaLinux, use dnf update -y instead.) 3. Create Your Main User With Sudo Access Doing everyday work as root is risky — a single typo can destroy the system, and attackers specifically target the root account. Create a personal user: Set a strong password when prompted. From now on, log in as deploy and use sudo for administrative commands. 4. Secure the Root Account You have two good options: Either way, do not leave the provider’s default or emailed root password in place any longer than necessary. 5. Set the Hostname Give your server a proper name — it shows up in prompts, emails, and logs: Replace myserver with something meaningful like web-prod-01. Verify with hostnamectl. 6. Set the Time Zone Correct time matters for logs, scheduled tasks, and SSL certificates. Set it to UTC (the server standard) or your local zone: List available zones with timedatectl list-timezones and confirm with timedatectl. 7. Configure the Firewall Ubuntu includes UFW, a simple firewall frontend. The golden rule: allow SSH before enabling the firewall, or you will lock yourself out: Then open only what you need. For a web server, add HTTP and HTTPS: Run ufw status at the end and confirm the rules look right. 8. Set Up SSH Key Authentication Passwords can be guessed; SSH keys effectively cannot. On your own computer, generate a key pair: Copy the public key to the server: Test logging in with the key in a new terminal window before closing your current session. Once keys work, disable password authentication and root login in /etc/ssh/sshd_config (PasswordAuthentication no, PermitRootLogin no), then systemctl restart ssh. Our full VPS security guide walks through this in detail. 9. Add Swap Space (Low-RAM Servers) If your VPS has 2 GB of RAM or less, a small swap file prevents out-of-memory crashes during updates or traffic spikes: Make it permanent by adding this line to /etc/fstab: Swap is slower than RAM — it is a safety net, not a substitute for enough memory. 10. Install Essential Tools Install the utilities you will reach for constantly: 11. Set Up Backups Before You Need Them Do this now, while the server is clean — not after your first crisis: 12. Install Your Application Stack Now install whatever the server is actually for. Common starting points: Install only what you need. Every extra service is extra attack surface and extra maintenance. 13. Enable Monitoring and Alerts At minimum, turn on your provider’s free monitoring alerts for downtime, high CPU, and full disks. For deeper insight later, tools like Netdata or Prometheus + Grafana are popular next steps — but provider alerts are enough on day one. 14. Reboot and Verify Everything Works The final test: reboot the server and confirm everything comes back correctly. Wait a minute, reconnect, and check: If everything survives a reboot, your setup is solid. What Comes Next With the checklist complete, your server is updated, hardened at a basic level, backed up, and running your software. Natural next steps as you grow: Conclusion Initial server setup is not glamorous, but it is the foundation everything else rests on. Update first, create a non-root user, lock down SSH with keys, enable the firewall, add backups before you need them, and verify it all survives a reboot. Fourteen steps, about an hour of work, and your VPS goes from a blank vulnerable machine to a properly prepared server. Future you — the one who never gets locked out, hacked, or caught without a backup — says thanks. Frequently Asked Questions Which Linux distribution should I choose for a new VPS? Ubuntu LTS (long-term support) is the safest choice for beginners: huge community, abundant tutorials, and five years of security updates. Debian is similarly solid. Choose RHEL-family systems (AlmaLinux, Rocky Linux) if you specifically need that ecosystem. How much RAM does a new VPS need? For a small website or learning server, 1–2 GB is enough to start. Databases, control panels, and Docker workloads are happier with 4 GB or more. Start small — you can resize most VPS plans later — but do not run production databases on the smallest plan available. Should I install a control panel like cPanel? Control panels make management easier but consume significant RAM, cost money (cPanel charges licensing fees), and add their own security considerations. If you are comfortable with the command line, skip the panel. If not, a free panel like HestiaCP or CloudPanel is

Initial Server Setup Checklist for a New VPS Read More »

Best VPS for AI agents – running an AI agent 24/7 on a virtual private server

Best VPS for AI Agents: How to Run Your AI Agent 24/7

In 2026, AI agents are everywhere. They answer customer support tickets while you sleep, scan markets and execute trades, write and deploy code, research topics for hours, and run entire workflows on their own. But every agent builder hits the same wall within days: an AI agent is only useful while it is actually running. Close your laptop lid, lose your Wi-Fi, or reboot for an update — and your agent stops dead. That is why experienced builders all land on the same answer. The best VPS for AI agents is a small virtual private server that stays online around the clock. For a few dollars a month, your agent gets its own always-on computer in a data center — working while you sleep, travel, or turn your own machines off. This guide shows you exactly how to choose one and run your agent on it 24/7. Why a VPS Is the Perfect Home for an AI Agent A VPS (virtual private server) is a slice of a powerful physical server in a data center, rented to you with dedicated resources and full control. Here is why it beats every alternative for hosting agents: Your laptop is fine for building and testing an agent. For running it in production, a VPS is the professional answer. What Specs Does Your AI Agent Actually Need? Good news: most AI agents are lighter than people expect. The heavy “thinking” usually happens on the model provider’s servers (OpenAI, Anthropic, Google) via API calls. Your VPS only runs the agent’s logic — receiving events, calling tools, making decisions, sending messages. Here is what to look for: When in doubt, start small — you can resize a VPS up in minutes with most providers, and you only pay for what you use. How to Run Your AI Agent 24/7: Step-by-Step Setup Here is the complete path from an empty server to an agent that runs day and night. It takes about 20 minutes. Step 1: Get a VPS Pick any reputable provider and spin up an Ubuntu 22.04 or 24.04 server with at least 2 GB of RAM. If you want full control over the setup below, choose an unmanaged VPS — it is cheaper and you learn how everything works. Step 2: Connect Over SSH From your terminal: Replace your-server-ip with the IP address your provider gave you. Step 3: Install Python and Basics Step 4: Upload Your Agent Code Copy your project folder to the server: Then create an isolated environment and install dependencies: Step 5: Run It as a Systemd Service (the 24/7 Secret) This is the key step. Running your agent inside a terminal session means it dies when you disconnect. A systemd service runs it in the background, starts it on boot, and restarts it if it ever crashes. Create the service file: Paste this in (adjust paths to match your setup): The magic line is Restart=always — if your agent crashes at 3 AM, systemd brings it back within 10 seconds. Now enable and start it: Step 6: Confirm It Is Alive You should see active (running) in green. To watch its live output: Press Ctrl+C to stop watching (the agent keeps running). Congratulations — your agent is now running 24/7, independent of your own computer. 5 Habits That Keep Your Agent Online Getting the agent running is step one. Keeping it healthy for months is step two: What Will This Cost You? Less than you probably expect. Typical prices in 2026: That is the entire infrastructure bill for a production agent. No per-seat fees, no platform cut — just the server and whatever your AI API calls cost. Frequently Asked Questions Do I need a GPU on my VPS for an AI agent? No. If your agent calls a hosted model API (which nearly all do), all the GPU work happens on the provider’s side. Your VPS just orchestrates. Only skip this advice if you are self-hosting a large open model on the server — which needs a very different, much pricier machine. If you do need serious GPU power — for example for AI video generation — see our guide to the best VPS for AI video generation. Can I run multiple agents on one VPS? Yes. Create one systemd service per agent (for example ai-agent-1.service, ai-agent-2.service), each with its own working directory. Just make sure the total RAM is enough — give each agent roughly 1–2 GB of headroom. What happens when the server reboots? Nothing bad. Because you ran systemctl enable, systemd starts your agent automatically on every boot. This is exactly why the service approach beats tmux or nohup for 24/7 operation. Is it safe to leave an AI agent running 24/7? Yes, with basic precautions: keep API keys in environment variables (never in code), set spending limits on your AI provider account, secure the server itself, and add monitoring so you know immediately if behavior looks wrong. An agent with no guardrails and no monitoring is the risky part — not the 24/7 uptime. Conclusion Running an AI agent 24/7 comes down to one decision: give it a home that never sleeps. A small VPS costs a few dollars a month, takes 20 minutes to set up, and with a systemd service plus basic security habits, your agent will hum along for months without you touching it. Start with a 2 vCPU / 4 GB Ubuntu server, deploy your code, wrap it in a service with Restart=always, and secure the box. From there, your agent is no longer a script on your laptop — it is a real production system, working while you do anything else. Prefer a visual, no-code route to always-on AI? Learn how to build an AI automation server with n8n on a VPS. If your agent’s main job is talking to people, you can host an AI chatbot on a VPS 24/7 on the same kind of server — our complete guide covers the model setup, the web UI,

Best VPS for AI Agents: How to Run Your AI Agent 24/7 Read More »